Boston Children's Museum
308 Congress Street, Boston, MA 02210
617-426-6500
© Boston Children’s Museum 2025
Website Design by JackrabbitIt is easy to introduce an art activity by telling children what materials they will use, based on what you know works best. But by asking them to conduct investigations around possible materials, they will not only be engaging in scientific thinking and learning about experimental design; they will also have a clearer understanding of the materials themselves, how they behave, and why they are chosen for use.
Gather materials for your students to include in their snow globes. For suggestions on where to purchase jars and glitter online, see Suggestions in the “Make it Better” step. If you have time, make a snow globe.
The small plastic objects and recycled materials will be used to create the “scene” that is placed inside the snow globe. These objects need to be small enough to stand up in the glass or plastic jars, and narrow enough to fit on the inside of the jar lids. And because they will be in water and other liquids, they should be made of plastic. Some non-corrosive metals might work too, but plastic is the safest bet. If you are having trouble finding good, fun objects for the snow globes, you can purchase cheap items online. See Suggestions in the “Make it Better” step for ideas.
As a precursor to this activity (or as an alternative if you are working with younger children and/or want a simpler experience) you might have children first make snow globes using the instructions in the Snow Globes activity from this curriculum, which is an artistic exercise rather than a scientific one. Once they have made snow globes using water and one kind of glitter in that activity, you can ask them if they can think of other liquids and other shapes of glitter that might work even better and then introduce this “Snow Globe Science” challenge.

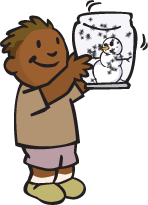
Ask your students if they have ever held or seen snow globes before. What do you do with them? What is usually in them? Record their list of what is contained inside a snow globe (this should include the objects that make the “scene”; a liquid; and “snow”). Tell them that they will be making their own snow globes, but that first they need to figure out what the best materials are for making them. If they are unfamiliar with snow globes, show them the one that you made, and shake it up to show off its snowing action.
Discover how to make the best snow globe possible using the materials provided.
LIQUID teams should experiment in order to answer these questions:
GLITTER teams should answer these questions:
After they have been experimenting for 10 minutes or so, ask teams to stop and come together as a larger group to talk about what they have discovered so far. How are teams testing these materials? Are they carefully measuring their materials and making sure to use the same amount of each material when comparing? What happens if they use too much glitter? Will they be able to see the object in the snow globe?
Have teams return to complete their tests. When they are done, ask them to report their findings to the other teams. Make a chart detailing Glitter/Liquid combinations, and whether the “snow” falls quickly or slowly in each combination. Ask your students if it is better to have fast, medium, or slow-falling snow. Is it possible that some children might want their snow to fall at different rates in their snow globes?
Now you should encourage children to each create their own snow globes: