Mini Golf

Engineering Health Math
Time Multi-session
Age 7 & up
Group Size 10 or more
Tags Building, Design, Found Objects,   more...
Game Games Golf Group Individual Math Problem Solving Recycle Teamwork

Can you create a fun, challenging golf course indoors?

Design engineering is a great way to teach kids problem solving, teamwork, materials and tool use, and the design process in general. In this activity, your students will also investigate angles, trial and error, and will use their math skills as they keep score of their golf round.

Preparation

The putters for this activity are made out of dowels and pieces of foam. The foam should be made of lightweight, stiff, thick, cut-able material. Ask parents for any packing foam they may have, check with local companies that may unpack boxes with foam in them and may donate the foam to you. You can also order foam online – polyethylene, 2″ thick closed cell foam works best. This foam is sold in sheets, which you can cut up. A 12″ X 12″ sheet will yield twelve 2″ X 6″ or eighteen 2″ X 4″ putter heads, which is likely enough for your class. If you can’t find foam, putters can be made by taping a piece of cardboard to the dowel, though this doesn’t work as well as the foam. See Suggestions (in the “Make it Better” step) for online part numbers to order this foam.

Cut the foam into rectangles 4–6 inches long and 2 inches high and wide—you’ll need one for each student, plus a few extras if any putters break. Create a putter for yourself ahead of time by piercing a dowel into a piece of foam, or gluing it or taping it to the foam.

If you have the time, make a mini golf hole with the available materials and test it out. The “hole” refers not only to the cup at the end, but to the entire playable part—including the tee box (where you start playing from on each hole), the fairway (the part in between the start and the end of each hole) and the cup (the end of each hole—where you need to hit the ball into in order to complete playing the hole).
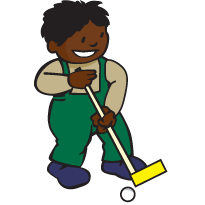
Mini Golf

Suggested Materials

  • Ping pong balls, or other small, light balls
  • Dowels, 1/2″ to 1″ in diameter (1 for each child)
  • Several pieces of stiff foam (see Preparations)
  • Recycled materials (e.g. foam tubes and rods, rolls of cloth, carpet samples, large cardboard tubes, coffee cans, cups, string, etc.)
  • Scissors and tape

Optional Materials

  • Hot glue guns and glue
1

Make it Matter

Opening Discussion

Ask your students if they have ever played golf or mini golf before. What equipment did they use? How do you keep score in mini golf? What does “par” mean? You can also show them the mini golf hole that you created (if you haven’t made a hole, have a volunteer draw a sample mini golf hole on the chalkboard or on a piece of chart paper). Ask them to point out in which direction they might hit the ball in order to make a hole-in-one. Is there more than one way to do it?  Is it impossible?

The Challenge

Make your own mini golf hole and play on the golf holes that your classmates create!

2

Make it Happen

Doing the Activity

  1. Group kids into teams of 3–4. Show them the materials they’ll use to make their mini golf courses.
  2. Present the challenge and set your students off to work creating their mini golf holes. This activity is designed to be completed over multiple sessions, so let your students know that you’ll be trying out designs today and perfecting them over the next few sessions.
  3. Walk around among the teams, and look for things you might talk about with them later. In this opening time, children will have to figure out the general shape of their mini golf hole, where in the room they would like it, etc. Look for early conflicts, especially when it comes to sharing materials and claiming space on the floor for their designs. Make sure that everyone is working in a fair manner! If it is difficult for the group to divide the space up evenly, you can place masking tape on the floor creating “fairway lines” for each team. Creating the kind of hole they would like to in a limited space presents an excellent design challenge for your students.
3

Make it Click

Let’s Talk About It

After 15–20 minutes, bring your students together to talk about what they’ve done so far. Remind them that you don’t expect them to be finished, but that you want to talk about how it is going. Have each team share their process. Ask them how they got started, what challenges they are facing, something that they started out not sure about, but then figured out how to do, etc. In particular, ask them how they are going to create the “cup” – the end goal of each golf hole. Have the teams share ideas for how they might do this. This early discussion should last no more than 5-10 minutes – it is simply a check in, and a way to share early ideas.

4

Make it Better

Build On What They Talked About

Send your students back to work more on their golf holes.  As they are building and designing, give your students some things to think about, such as:

Once each team has completed their mini golf holes, assign a hole number to each, so that the playing of the course can happen in an orderly manner. You might have a discussion before the playing starts, in which each team has a chance to show off the unique features of their mini golf hole.

After the children have played the entire course, have a wrap-up discussion. Have them talk about how easy or hard it was to hit the ball into the cup on some of the golf holes, how the ball reacted when it was struck against components of a hole made from different materials (does it bounce the same off of foam as it does off of wood?). Make a list of rules for their golf course, and for playing golf in general (ex. the harder you hit the ball, the farther it goes; bumpers around the edge of a mini golf hole help keep the ball from rolling away; you have to hit the ball harder to make it go uphill; etc.).

Suggestions

  • Foam rods and tubes (such as pool noodles or pipe insulation) make great boundaries for the edge of each mini golf hole. Aside from preventing the balls from rolling off the course, they help mark each team’s “territory”.
  • In the interest of space, you might give each team a set number of foam rods (if you don’t have rods or tubes, you can use string), or give them a perimeter or area that their golf hole must be created within.
  • If you are working with younger children, would like a less complex activity or are short on space, each team could be given a piece of cardboard or thick oak tag (approximately 24” X 36”) on which they must build their hole. Cut a circle at one end and place a cup in it so they have a target of where to hit the ball, and then encourage them to glue things under (this creates hills) and on (this creates obstacles) the cardboard or oak tag in order to construct their mini golf hole.
  • Before the first session, decide whether you can keep the mini golf holes in place between sessions, or if students will need to clean up and then rebuild their holes for the next time. If you can’t keep them in place, ask your students how they will know how to rebuild the holes the same next time. They should eventually suggest making drawings or taking pictures of their mini golf holes—make sure they do this. In the next session, refer to these drawings or photos and ask teams what changes they would like to make to their designs to make them even better.
  • You might create putters ahead of time for each of your students, depending on their level of ability.
  • Look for thick foam in packing supply stores or stores that sell “recycled” materials (some museums and school districts have stores like these).
  • If purchasing foam, you can get 12″ X 12″ sheets at McMaster-Carr (click here to visit their website). You’ll love this website for all sorts of stuff you need, and even more materials you had no idea you needed. Think of it as the biggest hardware store you’ve ever been in. Ever. Order part number 8726K73 (click here to be taken to the product page), the Polyethylene 2″ thick foam sheet. One sheet is $15 and will yield 18 four-inch putter heads; or 12 6-inch putter heads. One or two of these sheets should be enough for your class. The upside of this foam is that it works great. The downside…it only comes in pink.
Print Friendly