Boston Children's Museum
308 Congress Street, Boston, MA 02210
617-426-6500
© Boston Children’s Museum 2026
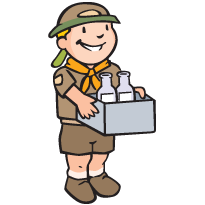
Website Design by JackrabbitMuch of the food we eat started out as something else. Bread comes from wheat, ketchup comes from tomatoes and cheese and butter come from milk. The process by which these foods are created is often a mystery to children, and by experimenting with making their own versions of these foods, they can begin to understand and have a greater appreciation for the fuel they are putting into their bodies.
Make some cheese ahead of time so you are familiar with the process. See Make it Happen instructions.
For this activity, teams will each need 2 empty cups, 1 rubber band, 1 coffee filter or small piece of cheesecloth and a spoon. Prepare small cups of lemon juice and vinegar for each team (just a couple of teaspoons per cup).
Ask your students to name as many different foods as they can that are made with milk. How do they think milk is turned into those foods? If cheese is not listed, you should mention it and ask kids to name all of the different kinds of cheese they know of. How are some of these cheeses different from each other (flavor, color, hard or soft, etc.)?
Can you make your own cheese?
After every team has made some cheese, stop your students and bring them together to share their observations with each other. What did they notice? How did the cheese taste? This discussion should last no more than a few minutes.
Have each team try making cheese with vinegar. Does it take more or less vinegar than it did lemon juice to make cheese? How does this cheese taste?
Boston Children's Museum
308 Congress Street, Boston, MA 02210
617-426-6500
© Boston Children’s Museum 2026
Website Design by Jackrabbit