Boston Children's Museum
308 Congress Street, Boston, MA 02210
617-426-6500
© Boston Children’s Museum 2026
Website Design by JackrabbitGiving children a chance to play with interesting materials in an open-ended setting allows them to develop observation skills, problem solving skills and methods of experimentation. The material used in this activity, “flubber”, acts in some ways like a liquid and in others like a solid.
Important Note: You will be working with Borax in this activity, which is a chemical and should be handled only by the teacher. Make sure that children wash their hands after they are done and be careful that they do not ingest the substance. If you are working with very young children, you might try the Oobleck activity as an alternative.
Create one large bowl of flubber. Put 1 1/3 cups of warm (almost hot) water in a small bowl and add 2 teaspoons of Borax. Stir until the Borax is completely dissolved (sometimes all of the Borax will not dissolve—this is OK). In the large bowl, mix 2 cups of Elmer’s glue with 1 1/2 cups of very warm water. Mix well. You may add a few drops of food coloring if you would like, though it is not necessary.
Pour the small bowl (Borax solution) into the large bowl (glue solution). Mix it well with your hands. Keep turning and kneading it, like dough, until you have solid material. There may be a small amount of water left—you can pour this off. You’ve done it—you’ve made silly putty! Cover the tables or desks in newspaper or do this activity outside. You can also make smocks for yourself and your students out of large trash bags.
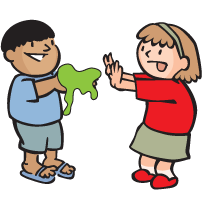
Ask your students if they remember the last activity, playing with Oobleck. What sorts of things could they do with the Oobleck? What surprised them about it? Tell them that today they will experiment with a new substance called “flubber”. Tell them that you don’t know a lot about it, and you’d like them to play with it and share their discoveries with you.
Play with this mystery substance and see what you can learn about it!
After your students have experimented with the flubber for about 10 or 15 minutes, have them take a break and come together to talk about what they’ve discovered. Create a list on a piece of chart paper or a chalkboard of the things that they discovered about flubber. Then ask your students to list some other things that they might like to find out by playing with it some more. How is flubber different from oobleck?
Have your students return to the flubber to answer some of the new or lingering questions. When they are done, have them help you clean up, then ask them to add to your list of what you all know about flubber.
Boston Children's Museum
308 Congress Street, Boston, MA 02210
617-426-6500
© Boston Children’s Museum 2026
Website Design by Jackrabbit