Tops – Big or Small?

Engineering Science
Time 45 minutes
Age 7 & up
Group Size 4 or more
Tags Binder Clips, Experiment, Pencils,   more...
Problem Solving Teamwork Tops

Do wide tops or narrow tops spin longer?

Now that your students have experimented with some of the basic design elements of homemade tops, they can play around with a new variable — the width of the plate used to make their tops. Will a top made with a wider plate spin longer, not as long or the same amount of time as a narrower top?

Preparation

This activity is part of the Tops series of activities. Make sure you have tried the first activity, Tops, before trying this one.

Place all materials on a table at the front of the room. You can cover the tables that your students will be working on with chart paper, butcher paper or newspaper. Make sure to tape this paper down.
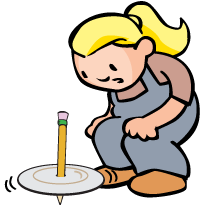
Tops – Big or Small?

Suggested Materials

  • Small (6″-8″) and large (10″-12″) Chinet or other heavy duty paper plates (50 of each)
  • Pencils (30)
  • Small binder clips (100)
  • Pencil sharpener
  • Stopwatches (10) or a clock with a second hand
1

Make it Matter

Opening Discussion

Ask your students about their experience making tops in the last Tops activity. What were some of the things that they could change to make their top spin better? Make a list of these observations on a piece of chart paper or a chalkboard. Tell them that you are going to give them some new materials to see if they can make a top that spins even longer.

The Challenge

Can you make a top that spins for at least 10 seconds, and can you figure our if wider or narrower plates help a top to spin longer?

2

Make it Happen

Doing the Activity

  1. Divide your class into teams of 3 for this activity.
  2. Have each team choose a materials manager — that student should come up to the materials table and gather 1 large paper plate, 1 small paper plate, 2 pencils, 1 stopwatch and up to 10 binder clips.
  3. Build a top using 1 small plate and a top using 1 large plate. If students try a design but wish to try another, they may build multiple tops, but teams should only use 1 plate for each top they build in this activity.
3

Make it Click

Let’s Talk About It

After 10–15 minutes, bring your students together away from the materials to talk about what they have discovered. Does plate size make a difference? Ask each team to share their spinning times for small plates vs. large plates and write these results on a piece of chart paper or chalkboard.

Ask your students if there is anything else they have learned about making a successful top. If you have seen any interesting solutions while you observed the teams, try to ask questions of those teams that will encourage them to share their findings. Some other variables that children may be experimenting with include spinning the top on the eraser vs. the pencil tip; turning the plate face up vs. face down; adding binder clips to the outside edge of the plate, etc.

4

Make it Better

Build On What They Talked About

Have your students return to their construction. They may continue working with their original design, or start making a new top. Let them work until they have all achieved the 15-second goal. If some teams are struggling, observe these teams, paying special attention to their spinning technique (the 2-hand technique described in the last activity will improve their time); the location of the plate on the pencil (a plate lower down will work better); how tight or loose their plate is on the pencil (a loose plate will not spin well at all — a binder clip above and one below the plate on the pencil, pushed together so that they are squeezing the plate will help a lot); and anything else that you notice. Make sure not to give them these solutions, but ask them questions or refer to earlier conversations to help lead them to these answers.

Suggestions

  • Students should discover that a wider top will spin longer than a narrower top.
  • Paper or plastic? Paper plates are suggested for this activity, but you could also use plastic plates — if you do a bit of work. The advantage of using plastic plates is that they are reusable. Paper plates tend to wear out, as the hole that the pencil pokes through gets bigger. On the other hand, you will probably need to prepare all of the plastic plates for the class. Simply poking pencils through plastic plates is not only difficult, it also tends to tear the plates, so you need to use a sharp or a heated object to make the hole —which might be dangerous for lots of kids to do on their own. In order to prep plastic plates, you can use a pointed knife, scissors, or a heated soldering iron to melt holes in the plates. Make sure that you have the right size soldering iron and that you are being very precise—if you miss the middle of the plate, there’s no filling that hole in! The other disadvantage to plastic plates is that because the teacher needs to prep them, kids miss out on the design challenge of finding the center of the plates. If you’d like to save some money and conserve paper plates, set aside an afternoon so you can prep the plastic ones. If you do use paper, have a conversation with your students about recycling.
  • If you don’t have stopwatches or a clock with a second hand, kids can time their tops by counting (“1 alligator, 2 alligator”; “1 Mississippi, 2 Mississippi”, etc.). This method is definitely not as precise as using a stopwatch or clock, so if you absolutely can’t get either of these tools and you choose to have kids count, have a conversation with them about a “fair test”. How can they be sure they are counting exactly the same each time?  Have them say “alligator”, “Mississippi” or whatever word you choose slowly, then quickly—did it take the same amount of time to say the word fast as it did slow? How might that change their experiment’s results? How can they make their counting as accurate as possible?
  • After trying this activity, have your kids experiment with different weights in the Tops – Heavy or Light? activity.
Print Friendly