Boston Children's Museum
308 Congress Street, Boston, MA 02210
617-426-6500
© Boston Children’s Museum 2026
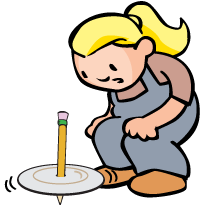
Website Design by JackrabbitBuilding and perfecting their own spinning tops provides a great opportunity for children to develop the kinds of skills that are so important in engineering and science discovery—problem solving, estimating, observing and more. In addition, this activity offers kids a chance to learn more about variables—things you can change in a design or an experiment that will change the outcome of that experiment. For more on variables, see Suggestions.
NOTE: It is VERY important that you use Chinet paper plates or an equivalent for this activity. Most other paper plates are too thin and will not make successful tops. Prefer plastic to paper? See Suggestions in the “Make it Better” step for how you might substitute plastic plates.
Sharpen the pencils and place all materials on a table at the front of the room. You can cover the tables that your students will be working on with chart paper, butcher paper or newspaper. Make sure to tape this paper down. If possible, collect tops of different shapes and sizes from toy stores, large retail stores, etc.
This activity is part of a series — after trying this one, check out all of the other Tops activities in this curriculum.

Ask your students if any of them have played with tops before. What does a top look like? Have a volunteer draw a top on a piece of chart paper or a chalkboard. How do you play with tops?
If you have some “real” tops, gather your students together and show them these tops. Just looking at the tops, do they have any predictions as to which will spin the longest and which will spin the least amount of time? Why did they make the predictions they did? Spin the tops and compare, then present the challenge.
Using simple materials, can you build your own top that will spin for at least 5 seconds?
After 10–15 minutes, bring your students together away from the materials to talk about what they have discovered. Was it easy or hard to begin building their tops? Have a discussion about the parts of a top. Refer to the drawings made earlier and/or the “real” tops. Which part of the top is the pencil used for? What about the plate? Do the binder clips help? How? What was the first thing they had to figure out? Ask your students how they figured out where to poke the pencil through the plate. Some students may say “in the middle.” Is that important? How did they find the middle of the plate? See Suggestions (in the “Make it Better” step) for some ideas on how to find the center of a circle. Ask if any teams have a design that they can share with the group.
Have your students return to their construction. They may continue working with their original design, or start making a new top. As you move from team to team, talk to the students about the following:
Now that they are pros, have kids try the next Tops activity, Tops – Big or Small?.