Boston Children's Museum
308 Congress Street, Boston, MA 02210
617-426-6500
© Boston Children’s Museum 2026
Website Design by JackrabbitChildren are getting fewer and fewer chances to explore with interesting materials—but few things spark creativity in kids more than a set of interesting materials and the promise of creating something wonderful. It is likely that most of your children will have come in contact with snow globes before…but also likely that none of them imagined they could create their own from simple ingredients.
Gather materials for your students to include in their snow globes. For suggestions on where to purchase jars and glitter online, see Suggestions in the “Make it Better” step. If you have time, make a snow globe.
The small plastic objects and recycled materials will be used to create the “scene” that is placed inside the snow globe. These objects need to be small enough to stand up in the glass or plastic jars, and narrow enough to fit on the inside of the jar lids. And because they will be in water and other liquids, they should be made of plastic. Some non-corrosive metals might work too, but plastic is the safest bet. If you are having trouble finding good, fun objects for the snow globes, you can purchase cheap items online. See Suggestions in the “Make it Better” step for ideas.
Are all glitters created equal? Not quite. Many will work well, but some will float in water, while others will sink too quickly. Test your glitter out beforehand to make sure it does what you want it to do. For a suggestion of where to find glitter that works well, see Suggestions in the “Make it Better” step.

The instructions that follow are for making snow globes as an art activity. If you are working with older children and would like to challenge them to explore the viscosity of different liquids and the properties of different kinds of glitter that might be used in the snow globes, try the Snow Globe Science activity in this curriculum.
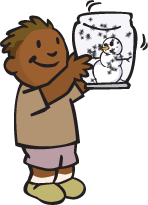
Ask your students if they have ever held or seen snow globes before. What do you do with them? What is usually in them? Record their list of what is contained inside a snow globe (this should include the objects that make the “scene”; a liquid; and “snow”). Tell them that they will be making their own globes out of simple materials. If they are unfamiliar with snow globes, show them the one that you made, and shake it up to show off it’s snowing action.
Make your own beautiful snow globe using the materials provided.
While their glued scenes are drying, bring the kids together to talk about what they have created so far. How did they decide what objects to use? Did they create a scene from their lives, or one that they imagined? What should they put into their snow globes next? When they mention “snow” or glitter, ask them how much they think they should put in. Is it a good idea to start with a lot or a little? Remind them that they can always add more glitter, but they won’t be able to get it out if they use too much, so they should probably start with a little.
After their glued “scenes” have dried for at least a few minutes, have children put water in their jars. Then, have them dip a toothpick (or plastic fork) into a bit of dish soap and touch the soapy end of the toothpick to the surface of the water in their jar, so that only a little bit of soap gets in. This will help the glitter sink after they add it.
Have them add their glitter, but easy does it! Each child should start with just a little glitter, screw the lid on and shake the snow globe up. Are they happy with the results? The glitter may be clumpy at first, but that will change. If they want more “snow”, they can add more until they are satisfied.